Quick Tour
Navigation
The minimalistic design of the calculator provides access to key features using one-tap selection of icons, located discreetly at the top of the input screen. These are identified 1 to 6 in the image and are described below:
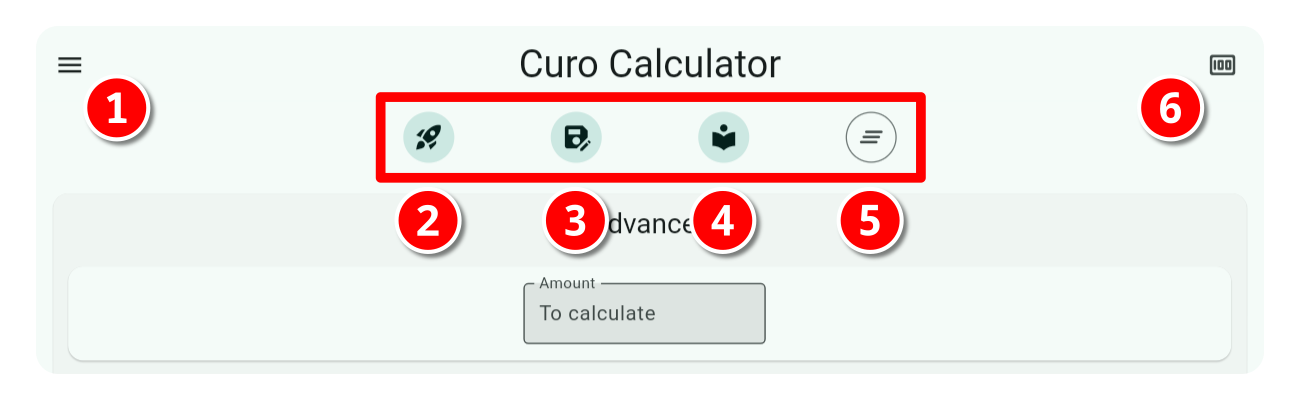
- App Menu Icon: Provides access to the calculator side-panel menu (covered below)
- Rocket Icon: Launches a pop-up selection panel containing a list of your saved templates. Use the search feature if required, and tap on the required template to load it.
- Save Icon: Launches a pop-up to capture details of the calculator input you want to save as a template. See My Templates > Creating a Template for more.
- Library Icon: Launches a pop-up selection panel containing a list of built-in calculation Examples. Use the search feature if required, and tap on the required example to load it.
- Clear Icon: Clears all calculation input and resets the calculator using your default settings.
- Currency Icon: Launches a pop-up currency selector using the currencies defined in Settings > Currencies. Use it to switch currency input and display formats.
The calculator side-panel menu shown below contains menu items labelled 1 to 4 and are described below:
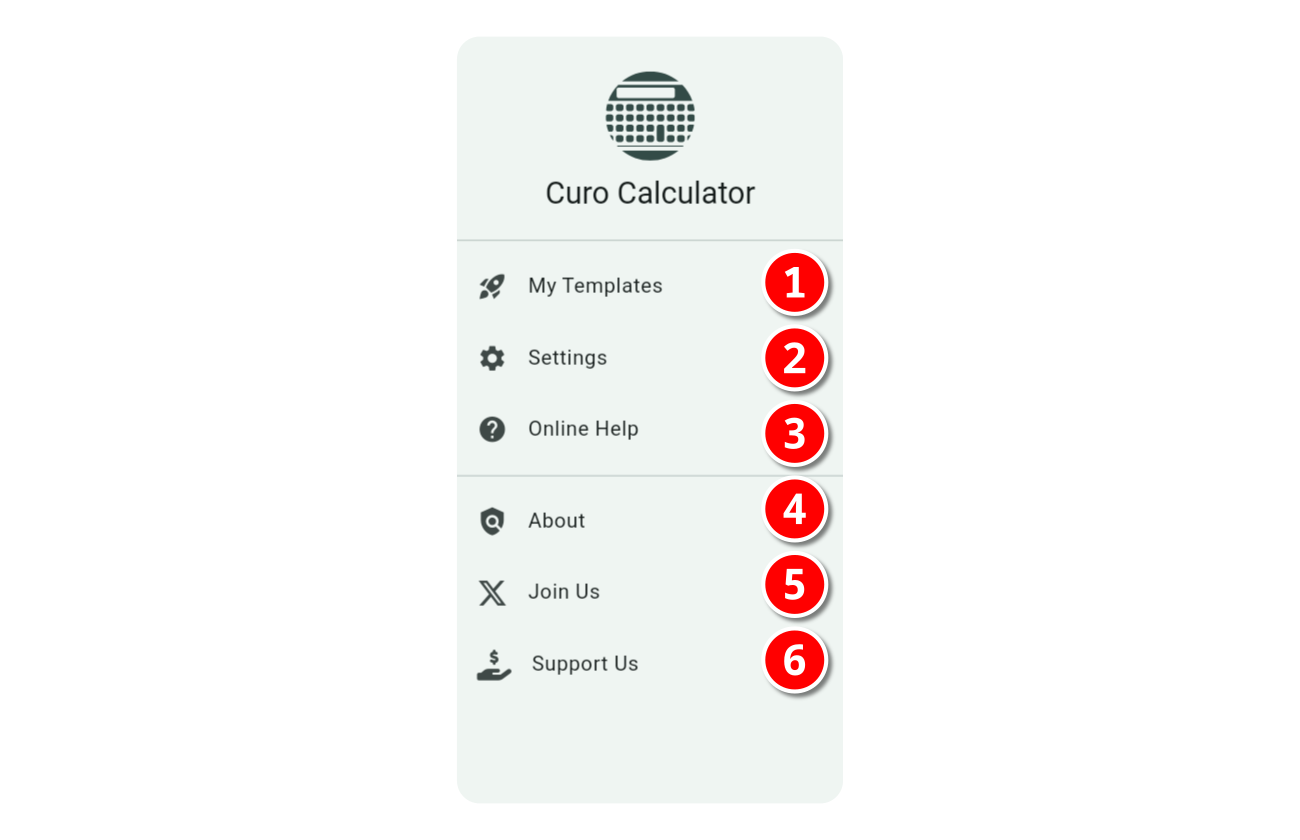
- My Templates: A screen for administering your templates, covered in the section My Templates > Managing Templates.
- Settings: This is where you tailor the calculator’s layout to suit your needs, whether for straightforward daily calculations or advanced financial scenarios. See Settings for more.
- Online Help: No more to add…you’re here!
- About: Provides basic information about the app, including version number which is important if you are reporting a problem, and also a disclaimer which we remind you is “The application is provided as is. Use at your own risk; no warranties are offered for performance, merchantability, or suitability.”
Before You Jump In…
We appreciate you just want to jump right in and perform some calculations, which we encourage, but here are a couple of points to bear in mind before you do:
Identifying What To Solve
To perform any financial calculation, you are required to provide only two out of three of the following inputs:
- Each or all Advance Values
- Each or all Payment Values
- The Annual Interest Rate
Leave the third input field blank or empty, or in the case of multiple advance or payment rows leave at least one amount field blank. This is how the calculator identifies the unknown to solve.
Tip
The calculator identifies the unknown value by graying out the input field and displaying ‘To calculate’ within it.
As an example, to calculate the implicit interest rate in a repayment profile, enter all advance and payment values, and leave the interest field empty or blank. Likewise for solving an unknown advance or payment value, ensure all of the other two inputs are provided.
Row Order Importance
When you specify more than one Advance, Payment, or Charge, a drag and drop icon is displayed on the left of each row, which you can use to drag the row to your preferred position.
When using date inputs (see Settings > Display Options > Date Input), reordering rows does not affect the calculation; each cash flow series starts on the date you specify.
However, row order is important for calculations without dates because all rows are processed sequentially. Keep this in mind when reordering undated rows.
On a related matter, also have a look at Core Concepts > Modes to understand the effect of mode selection when performing calculations without dates, especially when defining multiple Payment or Charge rows.