Creating a Template
You have two options for creating templates, each with its own benefits and drawbacks:
Create a Template from Scratch: This approach offers more flexibility, but requires you to manually adjust the calculator’s display options to activate the features you need.
Create a Template from a Calculator Example: This is by far the quickest and easiest method, but you cannot modify the display options of the loaded example.
Important
When a Calculator Example or a Template you’ve created is loaded, the Settings > Display Options used in its creation are applied and cannot be modified afterward. Therefore, creating a Template from an Example might not always be the best approach.
Regardless of the method you choose, the first step is to enter or modify all required calculation inputs. Perform a calculation to verify your inputs are correct for templating. Adjust and repeat as necessary. Once satisfied with the results, proceed to save these inputs as a Template.
Saving a Template
At the top of the calculator input screen, select the Save Icon as shown in the image.

This will launch a pop-up window as shown in the image. Field descriptions are provided below.
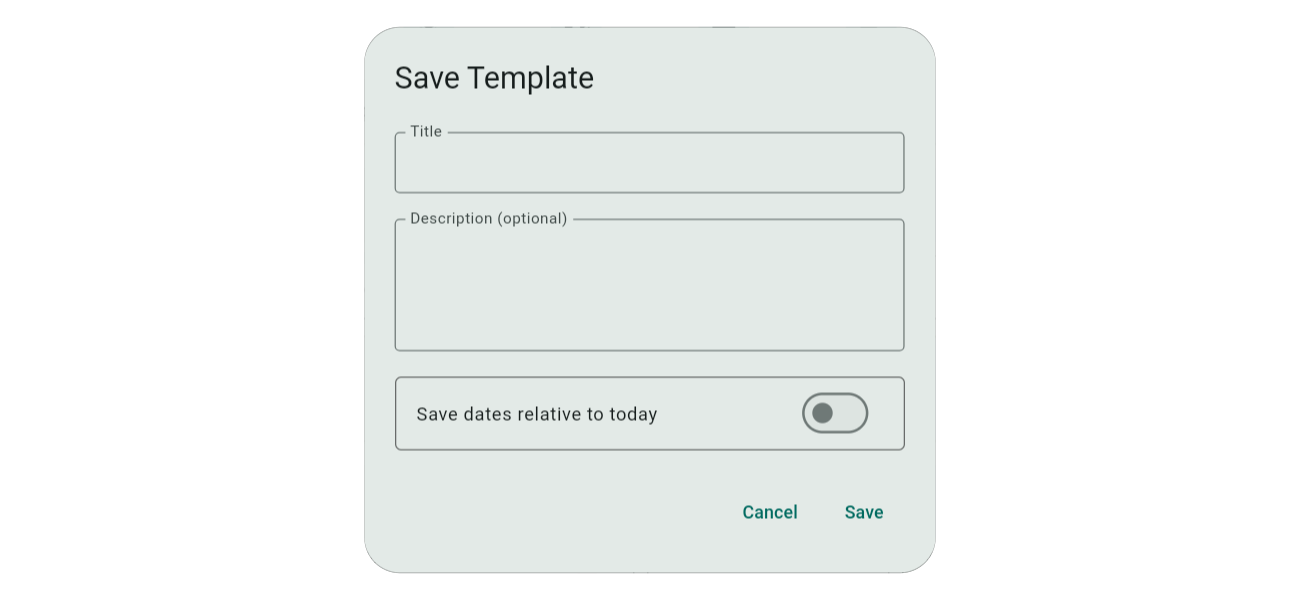
- Title: The title should uniquely identify your template for ease in identification and selection from a list of potentially many templates.
- Description: The description, which is optional, provides additional context beyond what the title suggests.
- Save Dates (switch): This switch is only displayed when a template contains date inputs. The two date-save options are:
- Save dates relative to today (button off): All dates are preserved as offsets from the current device/system date. When a template is loaded in the future, dates are rebased on the device/system date at that time, with offsets reapplied.
- Save dates as entered (button on): All dates are preserved exactly as entered.
Select the Save button when you’ve finished, or the Cancel button to abort. A snackbar at the bottom of the screen will confirm once the template has been saved.
After creating one or more templates, you’ll need to explore Managing Templates, a topic covered next.