To configure the Settings for Curo Calculator, first tap or click the three-bar icon in the top left corner of the app. This action will display a sidebar menu. From there, select Settings to load the settings screen where you can configure:
Display Options - Controls the features available on the calculator’s input screen.
Currencies - Set how monetary values are shown both in input fields and results.
Subsections of Settings
Display Options
Important
Display Options impact both Templates and Examples. When loading either, the settings used to create them are applied, and you cannot modify them until you clear the current calculation. To return to your default settings, simply clear all inputs.
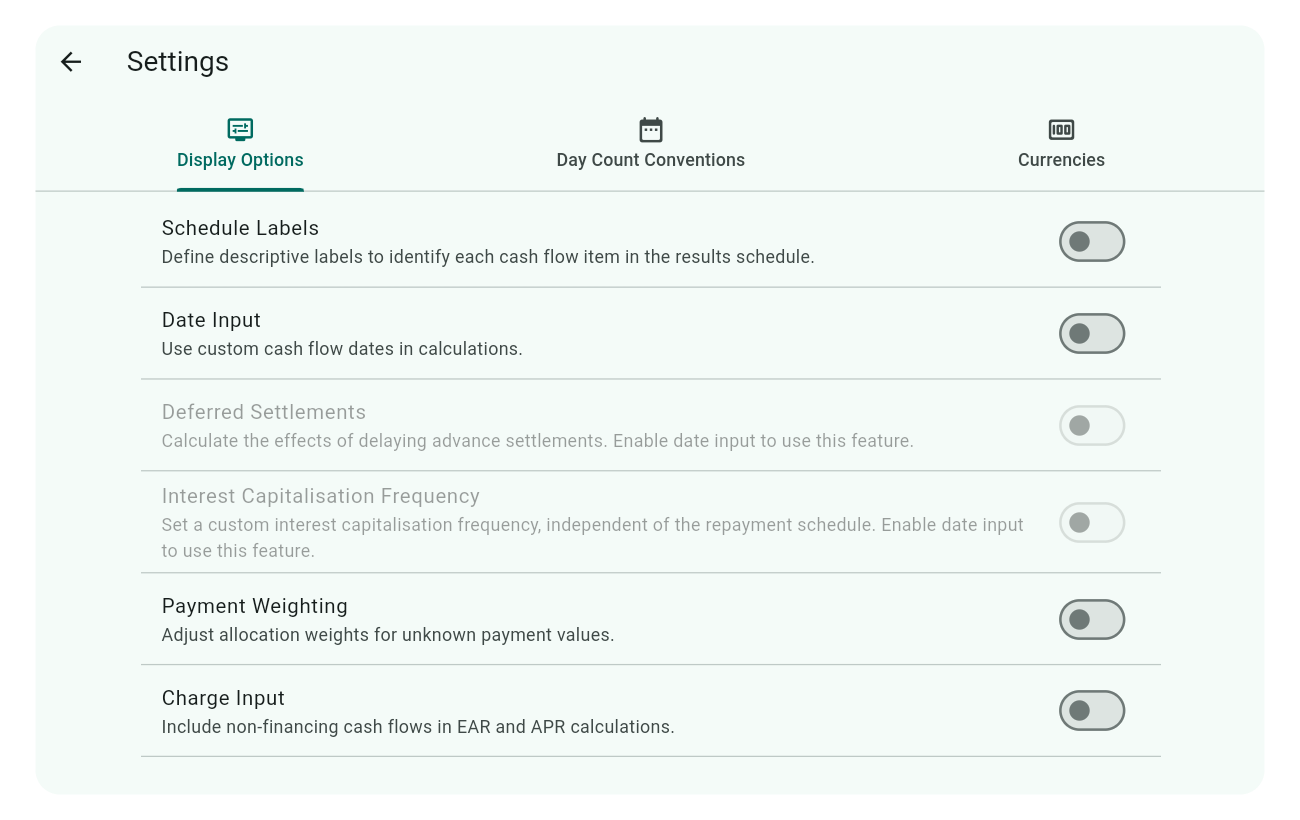
Here’s how the Display Options appear by default, with all options disabled, catering to simple financial calculations for everyday use:
For users with more complex needs, consider enabling the following features:
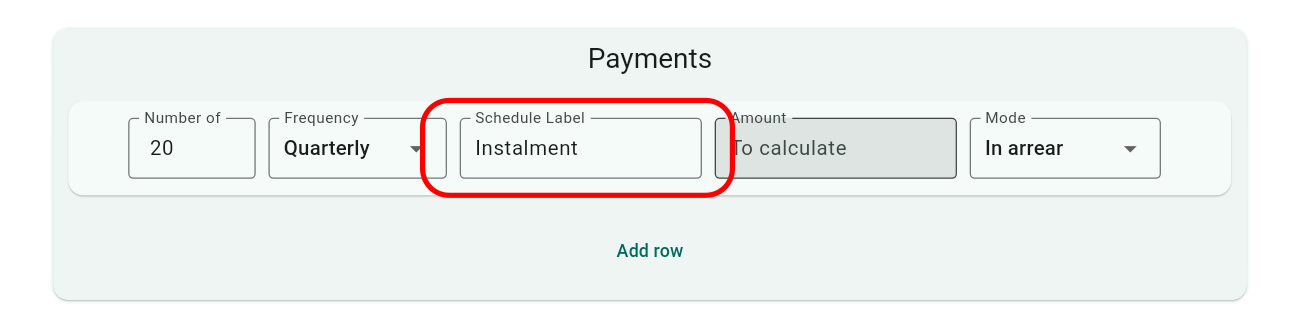
Schedule Labels
Enable this feature to add descriptive labels to each row under Advances, Payments, or Charges in the calculator input screen.
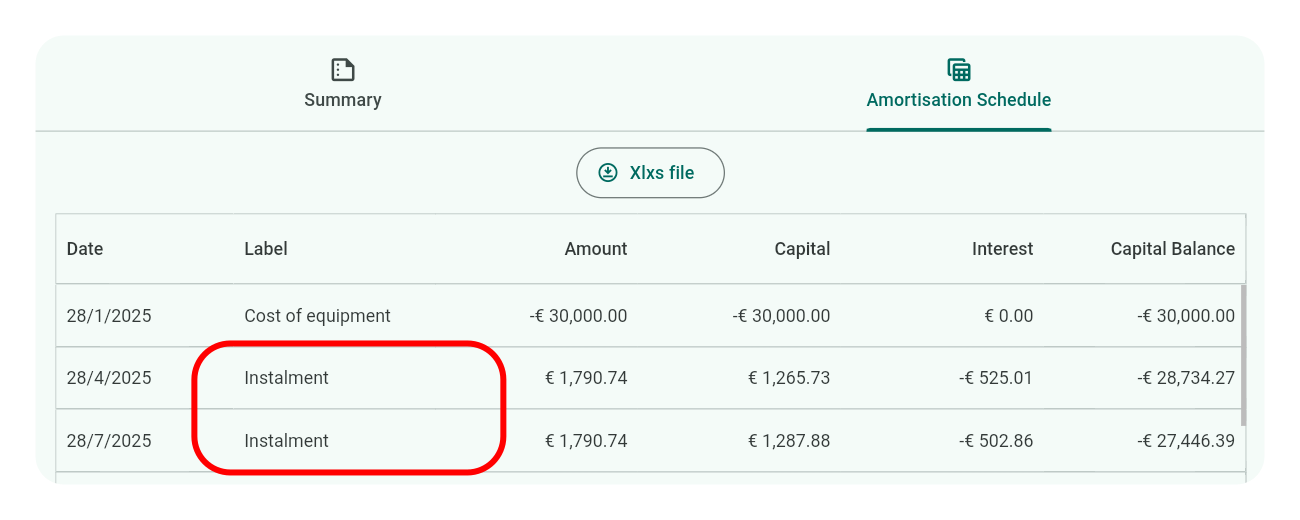
These labels appear in the results schedules, providing context for each entry.
Tip
Use singular forms for labels like “Rental” instead of “Rentals” for clarity in individual row descriptions.
Date Input
Activate this feature to manually set custom cash flow dates for your calculations. Once activated, the date input fields replace the Mode dropdowns in the calculator input, and the dates entered mark the start of each series.
Note
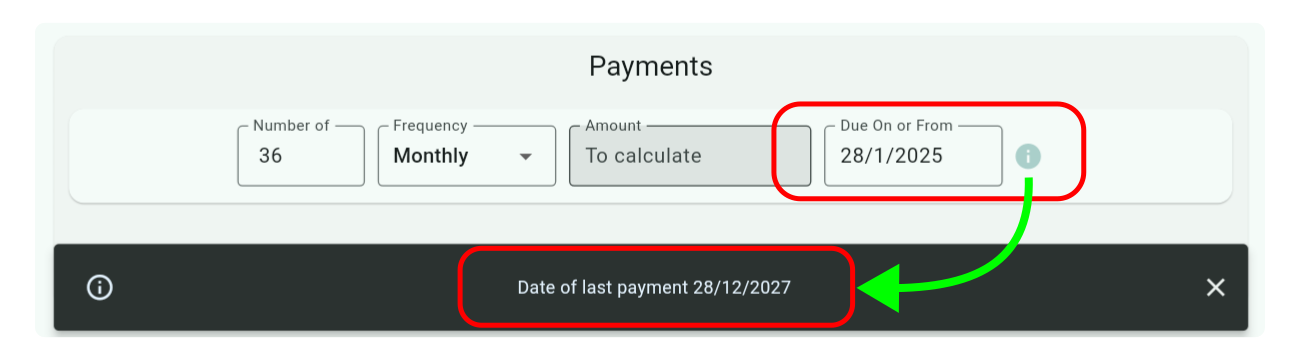
An information icon next to date fields in the Payments section provides additional context. Tapping this icon will display a snackbar at the bottom of the screen, revealing the date of the last payment in the series. This is crucial for constructing complex payment schedules.
For Detailed Usage: Explore examples 07, 09, 10, 12, 13, 14, and 15 for a thorough understanding of how to apply date inputs in various scenarios.
Important
Calculations always use dates, whether this feature is enabled or not. If disabled, the calculator uses dates from your device/system; when enabled, it uses the dates you specify. Thus, result schedules will always display dates, unaffected by this setting.
Deferred Settlements
Activate this feature to explore how delaying payments from a lender to an equipment supplier affects financial calculations under a finance contract. This vividly illustrates the concept of the time value of money and is particularly useful for lenders, though informative for all users.
Note: Enabling date input is required for this feature to function.
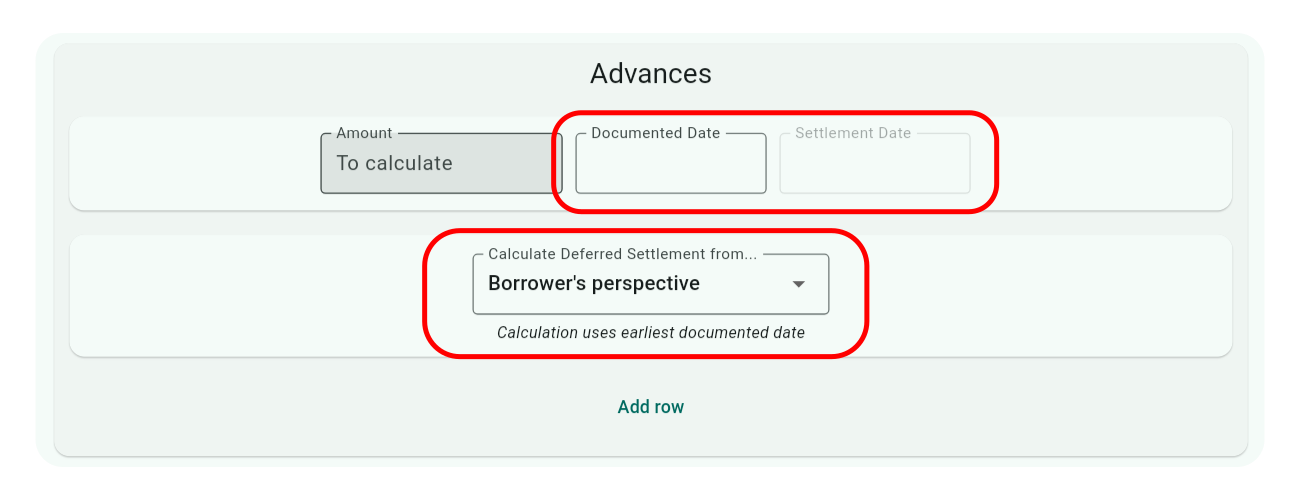
When activated, each row in the Advances section will feature two date fields:
Documented Date: This is the start date of the finance contract from the borrower’s viewpoint or the date of subsequent drawdowns if there are multiple advances before settlement.
Settlement Date: This date, which is on or after the Documented Date, marks when the supplier receives payment, hence the term ‘deferred settlement.’
A dropdown menu also appears, allowing you to choose the perspective for calculations:
Borrower’s Perspective - Using the earliest Documented Date.
Lender’s Perspective - Using the earliest Settlement Date.
For In-Depth Exploration: Check out examples 13, 14, and 15 to gain a comprehensive understanding of this feature’s application and benefits.
Interest Capitalisation Frequency
Activate this setting to customise how often interest is capitalised, independently from the repayment schedule. You must enable date input to use this feature.
Input Configuration:
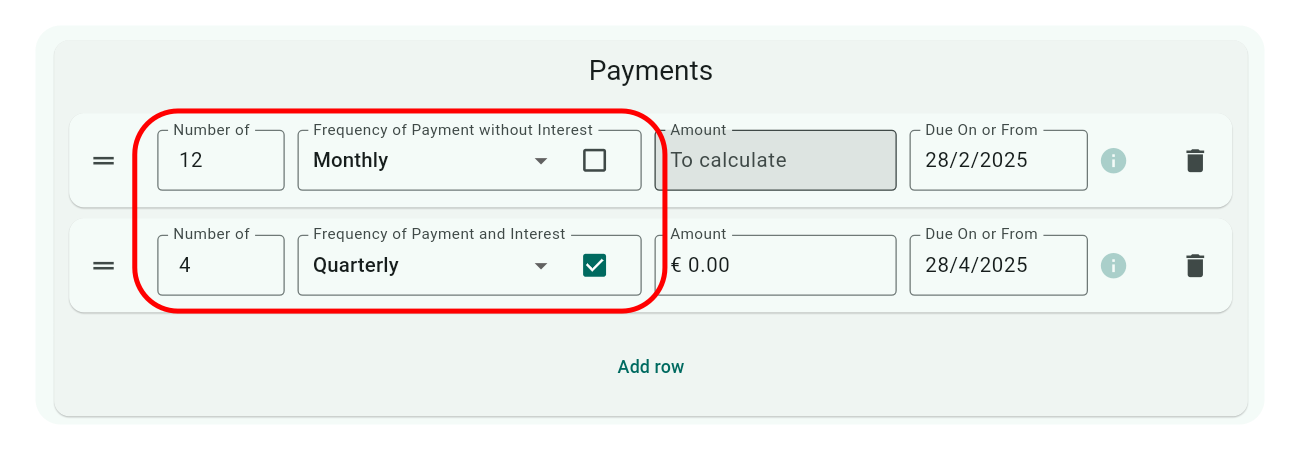
Create at least two rows in the Payments section:
For regular payments, uncheck the interest checkbox next to the frequency dropdown.
For interest capitalisation, check the interest checkbox and set the amount to zero to avoid unexpected results.
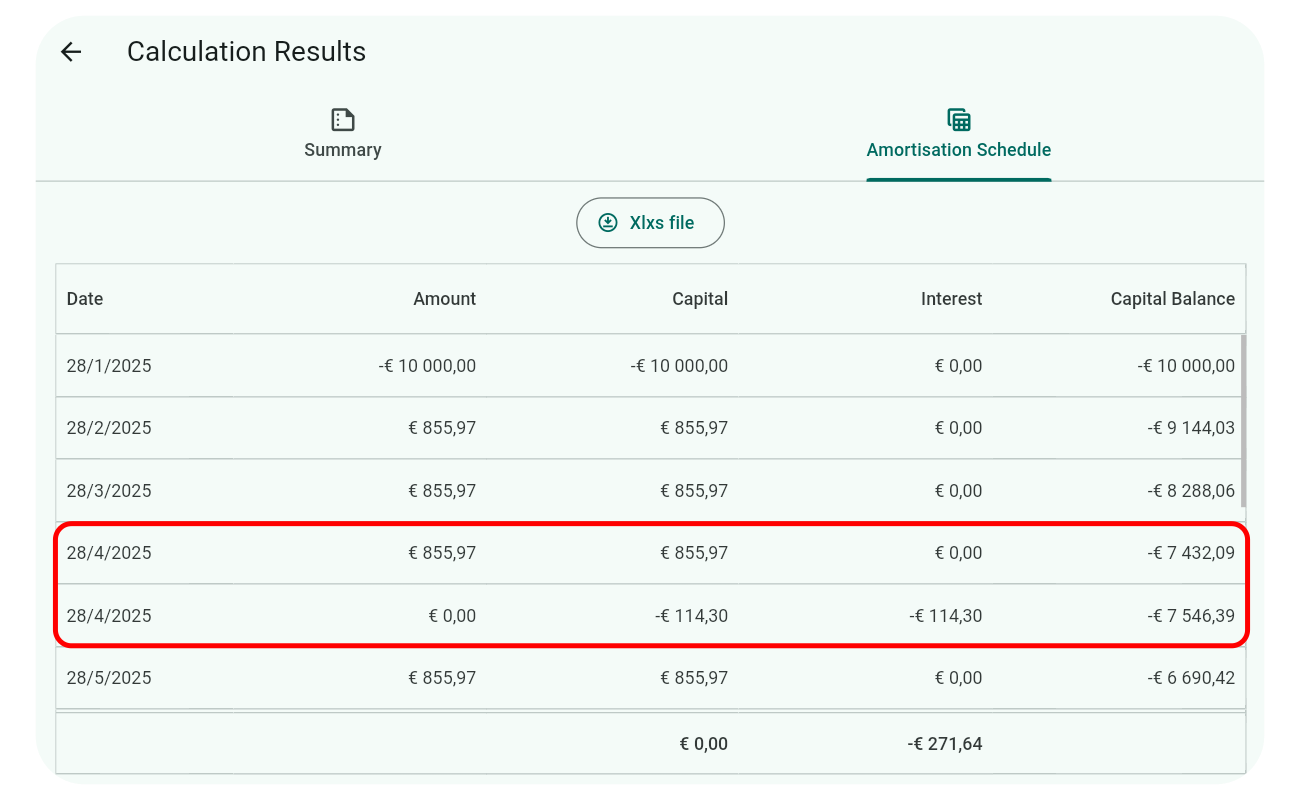
Example: The screenshots above and below show a scenario with monthly repayments and quarterly interest capitalisation. Note how every three months, the interest and repayment schedules align.
Detailed Example: For a deeper dive, see example 07.
Important
Ensure both the payment and interest schedules conclude on the same date for accurate calculations. Use the information icon next to date fields to confirm the longest dated end points of both schedules match.
Payment Weighting
Activate this setting to allocate weights to unknown payment values when dealing with calculations involving two or more payment series rows. An additional input field appears next to the amount field for setting the weighting of the unknown value.
This feature allows for proportional distribution of an unknown payment across multiple series, rather than solving for a single value.
For In-Depth Exploration: Check out examples 05 and 08 to explore this feature’s potential.
Notes:
Single Series Effect: Applying a weight to a single payment series does not alter the result; the entire unknown value is assigned to that series.
Known Payments: If a payment value is known, a weighting of 1 is automatically applied and cannot be changed.
Charge Input
Enable this setting to include non-financing cash flows in calculations. A Charges section appears on the input screen when activated.
Curo Calculator can solve for unknown interest rates or cash flow values, taking these defined charges into account. This is particularly useful for calculating legally mandated APR interest rates, which must include all mandatory charges associated with consumer credit agreements.
Each charge series row includes a Payment Method drop-down menu, allowing you to specify whether the charge is Cash-paid (paid directly by the borrower) or Financed (financed and added to the loan principal). This selection determines whether the charge is included in calculations, depending on the chosen Day Count Convention:
Standard Conventions (e.g., 30/360, Actual/Actual): Cash-paid charges are excluded as they do not affect the financed amount, while Financed charges are included as they increase the principal.
APR/EAR Conventions (e.g., US Appendix J APR, EU 2023/2225 APR): Cash-paid charges are included as they impact the total borrowing cost, while financed charges are excluded as they are assumed to be part of the provided rate or cash flows.
The table below summarizes how charges are handled based on the day count convention:
Day Count Convention Type
Cash-paid Charge Included?
Financed Charge Included?
Standard Conventions
No
Yes
APR/EAR Conventions
Yes
No
In the screenshot, both Label and Date inputs have been activated in Settings. For calculations involving charges, enabling Date Input is advisable to account for one-off charges at the end of the finance term.
For Detailed Usage: Explore example 18 to see how charges are applied in APR calculations.
Tip
Use the Payment Method drop-down to accurately model charges for regulatory compliance, such as including Cash-paid charges in US Appendix J APR, EU 2023/2225 APR, or other APR calculations.
Day Count Conventions
Note
This section describes how to manage day count conventions used in calculations. For a deeper understanding of what day count conventions are and their significance, visit Core Concepts > Day Count Conventions.
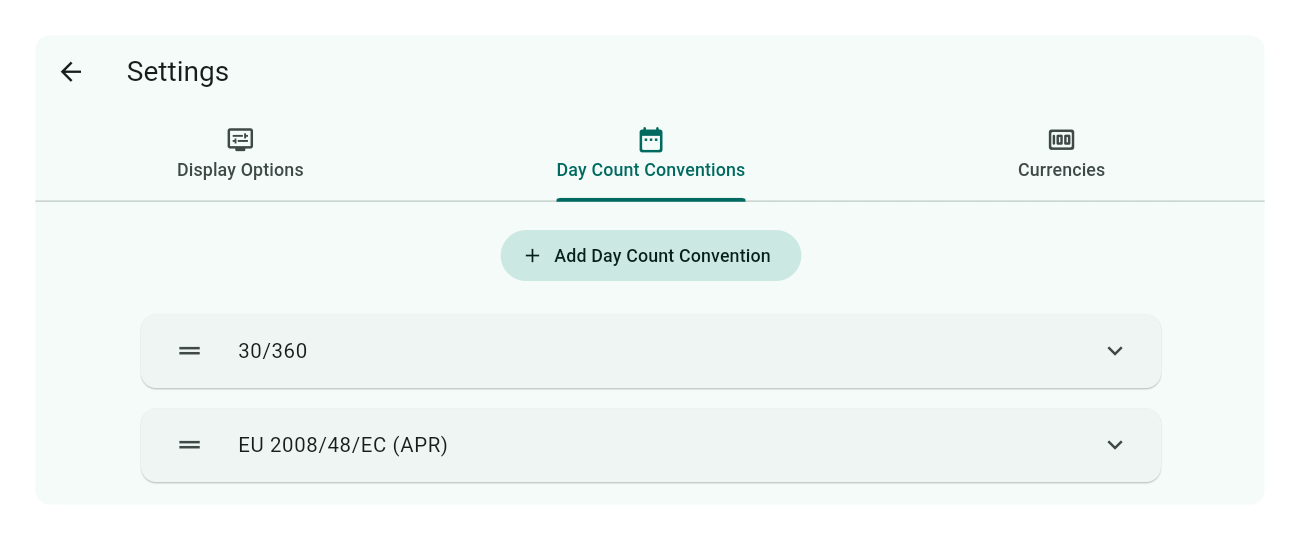
Upon app installation, a number of day count conventions are automatically added. These appear in an orderable list as shown below:
To reorder conventions, simply press and hold the drag and drop icon on the left of each convention row, then drag it to your preferred position.
The first convention in the list is set as the default and will be the first option in the Day Count Convention dropdown menu at the bottom of the calculator’s input screen, just above the Calculate button, as shown here:
Since all conventions are predefined and not user-modifiable, your options are limited to adding or deleting conventions from the list.
Add a Day Count Convention
Click or tap the Add Day Count Convention button above the convention list. This action will open a scrollable selector panel displaying available conventions not yet selected, each accompanied by a description of how the duration between cash flows is calculated. Choosing a convention dismisses the pop-up and adds your selection to the end of the list.
Delete a Day Count Convention
To remove a convention, click or tap the row of the Day Count Convention you wish to delete. The panel will expand, revealing a delete icon at the bottom right corner. Click this icon to remove the convention from the list. If you later need the convention, you can simply add it back as described above.
Note
You cannot delete the last remaining convention; there must always be at least one selected.
Currencies
Note
As explained elsewhere in this guide, the currency settings primarily affect how monetary data is displayed. However, the decimal precision set for each currency does influence calculations. Despite this, switching between currencies does not alter the nominal input values of the calculations.
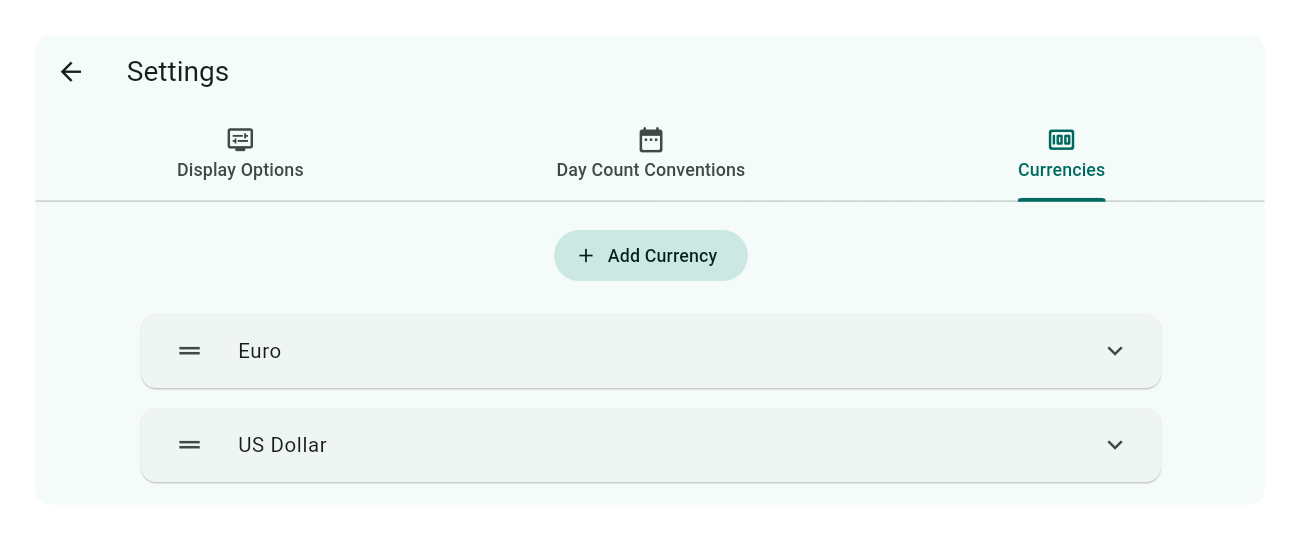
Upon app installation, a number of example currencies are automatically added. These are displayed in an orderable list as shown below:
The first currency listed is set as the default for display purposes. To reorder currencies, simply press and hold the drag and drop icon on the left of each currency row, then drag it to your preferred position.
All defined currencies will appear in the currency selector on the calculator’s input screen. To access this selector, click or tap the money icon at the top right corner of the input screen, as indicated here:
The next section will guide you on how to add, modify, or delete currencies.
Add a Currency
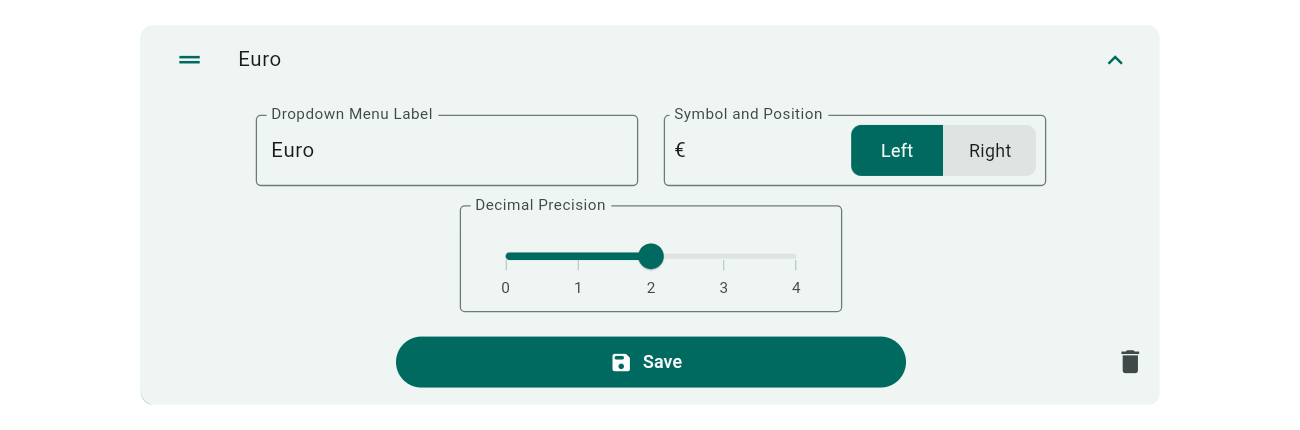
Click or tap the Add Currency button above the currency list. A new input panel will appear below the last currency:
Input Actions:
Dropdown Menu Label: Enter a short, unique title for the currency, which will appear in the currency selector. This field is required.
Symbol and Position: Specify your currency symbol and use the switch to decide if it should appear on the left or right of monetary values. This field is optional; leave blank for uncluttered display.
Decimal Precision: Use the slider to set the number of decimal places (0 to 4) for financial calculations, affecting both input and result displays. While typically you’d use the standard precision for the currency, you’re free to choose otherwise.
Once done, click or tap Save.
Edit a Currency
To modify a currency, tap on its row to open the input panel. Make your changes and then click or tap Save.
Delete a Currency
To remove a currency, tap on its row to expand the input panel, then select the delete icon. You’ll be prompted with a confirmation dialog to proceed.
Note
You cannot delete the last remaining currency; there must always be at least one defined.